Saturday, 27 September 2014

The Artichoke

Cynara scolymus © Shevaun Doherty 2012
Once upon a time, on a tiny island in the Aegean sea, lived a beautiful girl by the name of Cynara. So fair and lovely was she, that the Greek god Zeus, emerging from the sea after a visit to his brother Poseidon, fell for her charms the moment he laid eyes on her. He persuaded her to return with him to Mount Olympus, to live as a goddess and keep him entertained whilst his wife, Hera, was busy. However Cynara grew homesick for her family, and disobeying Zeus, returned once more to the mortal world. Enraged at her betrayal, Zeus cast her back to earth, transforming her into the artichoke, Cynara cardunculus

There is a lot of debate as to the true origins of the artichoke, although I quite like the fanciful tale above. It certainly grows in abundance throughout North Africa and the Mediterranean, and was much favoured as a delicacy by the early Greeks and Romans. The cultivated form of the plant lacks the spiny bracts of it’s wild cousin, the cardoon, and is called Cynara scolymus

Sketchbook studies of Cynara scolymus
It was first described by Theophratus, (371-287 BC) considered the “father of botany”, in his treatise 'Enquiry into Plants'. Later the artichoke became one of the illustrated medicinal plants that featured in DioscoridesGreek Herbal in the first century AD. 

Unfinished sketch of a dying flowerhead
As well as being a tasty dish, the Greeks and Romans considered the artichoke a digestive aid and an aphrodisiac. In fact, such was it’s reputation as a powerful aphrodisiac, that by the 16th century, women were actually forbidden from eating it! It was Catherine de Medici, wife of King Henry II who broke with that tradition, when she introduced it to France from Italy. She is said to have once eaten so many at a banquet, that the guests watched in horror, convinced that she was going to burst.

I can totally understand Catherine de Medici’s great fondness for the artichoke, as it is one of my favourite vegetable dishes too. My Egyptian mother-in-law always makes “al-kharshuf mashi” for me whenever I visit, a delicious dish of baked artichoke hearts stuffed with minced lamb. You can find that recipe here.

Placing a white board behind the plant is a great way to isolate it from it's surroundings for painting
 It’s also a great plant to paint, having a wonderful sculptural shape, with elegant arching silver leaves and round flower head, topped by mass of purple florets, known as the “choke”. I’ve painted it a few times now and it's not as difficult as you would think.

Follow the lines of the spiral. The bracts fit into those little shapes. A simple line drawing on tracing paper is a handy guideline to refer back to when painting
I begin by drawing out my plant in pencil first. This is one of the plants where the Fibonacci Spiral is quite evident, so getting the drawing right is very important.  I’ve found that it’s best to draw the basic shape of the flower head first (round in this case), and then to carefully observe the direction of the spirals within that shape, keeping in mind that they curve around the shape and aren’t just straight lines. Count the bracts on each line to make sure that you have the right amount. It’s a good idea to trace out this initial drawing and to keep this as a reference to one side, because once the paint goes on, it’s quite easy to lose your way.


I paint over the pencil lines in watercolour, using mixes of naples, raw sienna and quinacridone violet. I then erase my pencil lines. Once that is done, I started to slowly build up the colour, bract by bract. The green is a mix of lemon, cobalt and indigo. In places I switched to winsor yellow.


I also used raw umber, manganese brown, caput mortuum, perylene green and winsor violet here.
**This was painted last year and if I was doing it again, I’d probably replace the manganese brown and the caput mortuum with more transparent colours such as burnt sienna mixed with winsor orange or winsor orange-red, and perylene violet.**

I've added masking fluid to the little florets at the front of the artichoke and a few suggestions of the tips of ones behind
To tackle the choke, I've picked out a few of the front florets with masking fluid. I apply it with a thin brush (a cheap one, not a sable!!)  Sometimes I put it on with a toothpick. It's important to let it dry before you apply any paint, but also don't leave it on the paper for more than 48 hours as it can be hard to get off. 


The choke was done using Cobalt violet and helio blue. I painted this mix loosely over the masking fluid, dropping more paint into the wet wash and allowing it to blend and mix on the page. Once that was completely  dry, I carefully rubbed off the masking fluid, and began to paint the little florets using pale mixes of the blues and purples. I used purple lake (quin violet would also work), Egyptian violet (Lefranc & Bourgeois), permanent blue violet (Rembrandt), winsor violet and perylene maroon. 


You have to slowly build up the shapes within... at first painting the florets, and then once you have achieved the right colour and tone for them, switch to painting the shadows and negative shapes between. I did have to lift a few florets out as I went too dark... it's just trial and error. Try to keep the florets that had been masked off  quite pale.

It will look a real mess at first, but persevere. It takes time and patience.  All of a sudden it takes shape and becomes believable.

Getting the dark shadowy bits at the top of the bracts and just below the choke made a real difference, and pulled the painting together I used winsor violet mixed with perylene green to make a nice dark colour.

Artichoke flower head, Cynara scolymus © Shevaun Doherty 2013

I've yet to paint an artichoke flower this year, but only because I haven't come across one yet. Any offers would be gratefully received! My botanical artist friend Jarnie has been growing one in her garden and has been taking gorgeous photographs of it on her blog, so I'll be watching with interest to see just how she goes about painting it. 

"The artichoke with a tender heart
Dressed up like a warrior, standing to attention,
It built a small helmet under its scales,
It remained 
Unshakeable"
Pablo Neruda, Ode To The Artichoke

Note: although the story of Zeus and Cynara is widely found on the internet, I can’t find a verification of it being a genuine tale from the Classics, but I like it anyway

Monday, 22 September 2014

Daily Moments


 “Painting from nature is not copying the object; it is realising one's sensations.”  
Paul Cezanne

This week has been a busy one, but inspired by the artists who are taking part in the 30 Day Challenge, I have managed to put aside an hour or two each day to sit down and paint. There is something quite liberating in doing these small daily challenges. The focus is not on producing a finished piece of work, but just on the simple pleasure of creating.

The week began with a study of geranium flowers. I had been asked to paint a single flower as part of a commission, but it was such an enjoyable subject that I couldn’t resist filling the page with petals and buds. Every time I see geraniums I think of warm sunshine and the long lazy days of summer… bliss!

The trick to painting reds is to use lots of layers. I used initial washes of winsor orange, winsor orange-red and permanent rose. Then I applied glazes of scarlet lake, vermillon, winsor red and finally Schmincke Dark Red, which I think is the best dark red that you can find. For the darkest shadows, I mixed the dark red with a tiny bit of winsor purple.

Next up was the strange little fruit of the  Handkerchief treeDavidia involucrata. This tree is best known for the large leafy bracts which hang like white handkerchiefs over small flowers in spring. I was curious about the fruit, which had a slightly pungent aroma, so included a dissection.

Davidia involucrata

Gingko biloba leaf. 
A  Gingko leaf was next on my easel. My little leaf was past it’s best but that made it all the more enjoyable to paint. I have never painted one before, but it’s a very popular choice for botanical artists, perhaps because of Rory McEwen’s superb depiction of a gingko leaf. For those who have never heard of Rory McEwen, he was one of the most influential botanical artists of the twentieth century. Here's a short video about his work-


The following day I painted the tiny blue fruit of the Woodland-Passionflower, Passiflora moriflora.  I was short of time, so did just a simple line drawing of the vine and the leaf. It’s such a pretty plant with an abundance of flowers and wonderful tendrils, definitely one for my ‘Must Paint List’.


 I was quite curious about the little blue fruit that I had painted, so the next day, I cut it open. I was surprised to find bright orange seeds and deep purple flesh. What a striking and unexpected combination. It tasted horrible though!


My final subject was a tiny acorn that I found whilst out on my walk. I collected quite a few which I hope to paint before putting them in the garden for the hungry resident squirrel.


The weekend came but there was no time for painting because I went on a photography workshop in  June Blake’s Garden in Co. Wicklow. What a stunning place! This excellent workshop was run by Bernard Van Giessen of www.catchlight.ie.


Although I almost always paint from life, I also take reference photographs of my subjects as a back up. I also prefer to photograph my work as I find the scanner too harsh. However my little camera has been set on automatic since the day I got it, and I really wanted to learn how to use it properly.


 What a wonderful day it was! The garden is magnificent and Bernard was patient, informative and incredibly encouraging. To top it off, the company was great and there was a really delicious lunch too.


By the end of the day, I had learnt how to take a semi-decent photograph, met some lovely people and finally understood what an f-stop is! It’s definitely manual all the way for me from now on!


Life may be hectic, but it’s really worth putting aside a little time each day to live in the moment. Paint, draw. or simply go outside and take a photograph.

“Be happy in the moment, that’s enough. Each moment is all we need, not more.” 
Mother Theresa


Friday, 12 September 2014

Autumn Treats

"Every leaf speaks bliss to me, fluttering from the autumn tree." Emily Bronte


Autumn is a visual feast for botanical artists. No season in all the year is as radiantly glorious as the early autumn, particularly when the weather is as pleasant as it has been this week.

“The time of the falling leaves has come again. Once more in our morning walk we tread upon carpets of gold and crimson, of brown and bronze, woven by the winds or the rains out of these delicate textures while we slept.

      How beautifully the leaves grow old! How full of light and color are their last days!” 
  
  John Burroughs (The Falling Leaves)


This week, I’ve been busy with a commission, and whilst painting a non-botanical subject has been a pleasant change, I must confess to feeling a pang of longing every time I step outside. The beautiful russets and golds of fallen leaves lie everywhere, and every hedgerow seems festooned with an abundance of berries and fruit- scarlet, jade, crimson and purple.


Everywhere the delicate green flowers of the ivy beginning to peek out from their glossy  coat of green leaves, attracting a host of nectar-hungry insects.
Conkers (the fruit of the Horse chestnut tree Aesculus hippocastanum) are also starting to fall, some still encased in their spikey green coats, whilst others lie gleaming like polished wood amongst the leaves. I want to pick them up and bring them all home. 

Conker -Fruit of Aesculus hippocastanum
As a child, my brothers and I would forage for hours seeking out the biggest, strongest conkers. The chosen conker was threaded onto a string, and then the conker battles would begin. The idea is to hit your opponent’s conker and smash it. Some people would ‘cure’ their conker by putting it in a warm place to harden, but I must confess to cheating and giving my conkers a secret coat of clear nail varnish.

Ready for battle!
During the First World War, there was a campaign in which everyone (adults and children), were asked to collect horse-chestnuts, and donate them to the government. The conkers were used as a source of starch to produce acetone, which was then used to make the cordite in military armaments. Conkers were chosen because they are rich in starch but not edible, Unfortunately the process was not efficient, and the factory closed after a few months. However, it's easy to imagine the happy respite from the horrors of war that this conker-gathering would have brought to families.
Immature magnolia seedpod

Rosehips
Damson study

This month a number of my botanical art friends are taking place in what has become an annual online event, The 30 day ChallengeEvery day in the month of September, artists from all over the world have been painting small found treasures, and sharing the images online. I've missed the first two weeks of this year’s challenge, but with such an abundance of Autumn treasures, I’m really tempted to join in for the final flurry. You can read more about the challenge (and also how to take part) on my friend Sigrid Frensen’s blog- http://sigridfrensen.blogspot.ie/2014/09/30-day-challenge.html 

Dianne Sutherland Ball's 30 day Challenge painting is a real feast for the eyes.
You can read about the challenge on her blog-  http://diannesutherland.blogspot.ie/2013_09_01_archive.html


"Autumn, the year's last, loveliest smile."
-William Cullen Bryant

Saturday, 6 September 2014

A Creative Buzz


 The Paper Elephant Exercise (photograph by David Bell)

“Drawing is a gateway to creativity.” 
Julie Douglas

Last weekend I had the honour and privilege of being invited to take part in Draw-In, a Drawing Symposium in the Belfast College of Art.  I was really excited at the idea of meeting such an impressive group of artists, but I was also a teeny bit daunted. It’s only recently that I’ve started to put the word ‘artist’ beside my name, and all the invited artists were jaw-droppingly talented and very accomplished. Real artists! To add to my mounting fears, I would also have to speak to the large crowd of art lovers and students who were coming along to the event.

Me with the wonderful Julie Douglas!
I needn’t have worried. Julie Douglas, the organiser and a brilliant artist herself, is one of those people who immediately puts everyone at ease with her mega-watt smile and warm personality.

Julie calls herself as a ‘Creative Experience Navigator’and her students describe her as "Different, Delicious and Refreshing." She really is!!
The day began with a really great exercise. Everyone was given a piece of paper and told to stand up. We then had a minute to tear out the shape of an elephant, behind our backs and NO peeking. The results were unpredictable and quite funny- try it! It's not as easy as it sounds!

My paintings and sketchbooks were on display too

The art-lovers and students were great- really encouraging, asking just the right questions and showing a genuine interest in the creative process.  Two of the artists, Colleen Barry and Matt Weigel, had flown over from the States to attend the Symposium, and also to give workshops in classical realism. Their work is superb, and the results from the workshops were quite impressive.


Peter Cooper, ‘the animated animator’, kept us all entertained whilst he created (and acted out) one of his creatures, a pot-bellied man eater. I loved his dragons. To add to the experience, we were all given sculpey to knead and pull into shapes whilst we listened and watched. Some of these audience creations were incredible. 

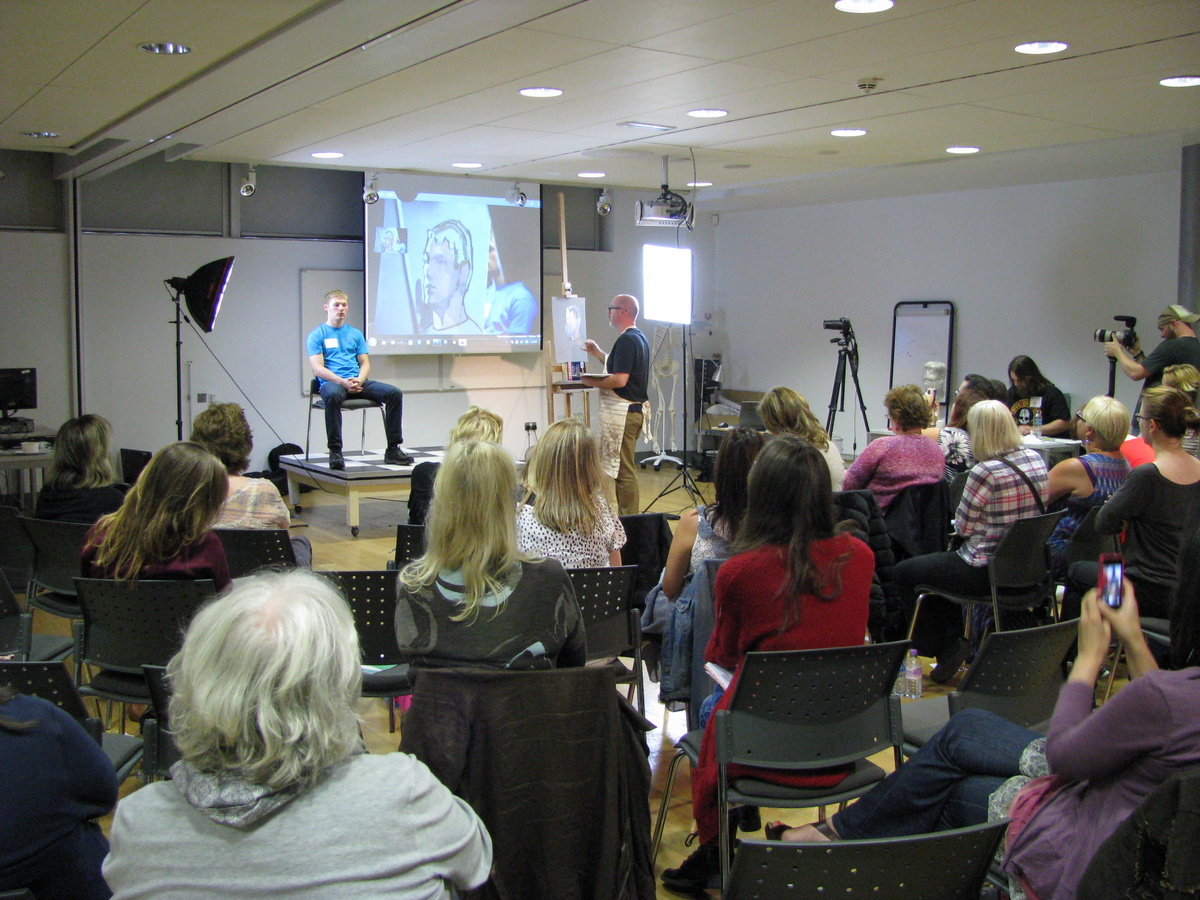
Master and model... the great PJ Lynch and Rory, Julie's son
PJ Lynch has long been an art hero of mine. He is the most wonderful illustrator and his books have charmed and delighted a whole generation of children and parents, myself included. PJ did a portrait demonstration in oils, and managed to complete it in an hour whilst answering a barrage of questions about his techniques from the audience. You can see more photographs of the day on his blog here

The master at work!
I really enjoyed talking to PJ and found him incredibly inspiring, so much so, that I am going to throw caution to the wind and join him on one of his portrait workshops in a few week’s time. I’m looking forward to the challenge of painting an unfamiliar subject in a new medium with huge brushes! 

A selection of PJ's sketches and books

Aidan McGrath had some fantastic photographs that I had to look really closely at, because they looked just like finely detailed paintings. I also brought up the incredibly inspiring sketchbooks of Susan Sex, one of Ireland’s best known botanical artists.

Paul's talk was captivating
However,  I think it was the talk given by Paul Foxton than resonated the most with me. Paul is one of those gently spoken souls who has a wonderfully philosophical approach to art. He is deeply interested in the cultures of the Far East. He showed us some of his techniques and spoke so eloquently about the sensitivity of charcoal, that I wanted to rush out and start drawing in charcoal there and then. He encouraged everyone to develop an art habit, even if it was simply a matter of ensuring that you sat down at your table and opened your sketchbook every day. 
His blog learning-to-see is equally motivating and well written. It’s definitely worth checking out.

“Every time we immerse ourselves completely in an act of creation (no matter how insignificant it might seem) we have arrived. Every time we do that, we transform ourselves a little more: we find more peace, develop our focus and attention a little more, become stronger in ourselves.”
 -Paul Foxton

At the end of the day, once the crowds had gone home, the artists all went for a meal together. The conversation was brilliant, exciting, motivating and interesting. There was a creative buzz in the air- I caught it, put it in my pocket and took it home.

“The soul should always stand ajar, ready to welcome the ecstatic experience.”

― Emily Dickinson

Friday, 29 August 2014

From Ripe to Riper


“August rain: the best of the summer gone, and the new fall not yet born. The odd uneven time.”
 ~Sylvia Plath


It’s been yet another messy week of interruptions, but finally the kids are back in school, and hopefully, life will once more settle back into a blissful routine.  I miss my long painting days!

I have managed to keep the painting cravings at bay by doing some small studies of dates. Yes, a few fresh dates made their way back to Ireland with me, to be painted, eaten and hopefully planted. Fortunately they last a long time, especially when kept in an airtight container in the fridge.

The changing colour of dates from ripe to riper 
I love this stage of ripeness, known as “Rutab” in Arabic. The dates are very soft, sweet and moist, quite different to the dried stage which we are all familiar with. Ideally the dates would be left on the tree to become dry, but I might try to air-dry these myself. 


Meanwhile, I am just enjoying the wonderful rich reds of the ripe dates. I could never get bored of painting them, or eating them!


Someone asked me how I paint my highlights, so I have included a short step by step in this week’s post. Whilst you might not have fresh dates to paint, the same technique would be ideal for cherries, plums or rosehips, or any similar round shiny fruit.

Know your colours

Over the years I have accumulated quite a large collection of red paints. In fact, I have far too many paints of all colours (but at least they are cheaper than shoes) ! It’s really not necessary to have a huge number of paints, but it is important to know the cool tones from the warm, and also which colours are transparent, semi-transparent or opaque. The easiest way to do this is by making a colour chart. Lay them all out and decide which are closer to orange and which are closer to purple. Look to see which paints granulate, and which give clear smooth washes. Keep your colour chart close at hand. I often refer back to my colour chart whilst painting to help me decide which colour to use next.

Red colour charts. I've left some room on the larger one, just in case I happen to come across another red.

Check your lighting

The first thing that I always do is make sure that the lighting is good.  I prefer the traditional way of lighting from the left (I’m right-handed). I don’t like artificial lights, particularly overhead lights, as these can create confusing highlights and shadows. On very overcast days, I will use a daylight lamp and something shiny to bounce the light back up onto the subject, but in truth, nothing beats a natural light. You can see an example of a dark rainy day set up here

The date is placed on a small piece of paper to protect the paper beneath and then carefully drawn it out with a 2H pencil

Painting

Find your highlights. It’s important to take note of where they lie and also how shiny they are. I start with Cobalt violet and then add cerulean (Schmincke) to the shadows, making sure to leave the highlights clear. Usually the side which is furthest away from the light has more of a blue tone. I paint quite wet at this stage and let the colours blend on the paper. Sometimes highlights are very bright, but here they were soft, so I kept the edges of the highlights soft by using a second damp brush to blend it all in.

These are the colours that I used for this date, starting with the ones on the left

When I first started painting botanicals, I remember feeling quite confused by the term “disappearing edges”, which is often used to describe how the surface of a fruit curves away from you. I kept wondering how an edge can disappear, if I can so obviously see it! A better way to describe this process is to say “bring the middle bit forward”, although admittedly that’s a bit of a mouthful! To create this effect, you use warmer colours in the centre of the fruit, and build up the layers of transparent colours so that the middle part is the most saturated, leaving the paint around the edges is quite thin.


I usually start in the center with a bit of winsor orange which is a nice yellow orange, and then winsor orange-red,  building up the layers of colour and using progressively darker reds, until I am on to the purples. I paint quite drily, but always make sure that my brushstrokes follow the form of the fruit (across the width and along the length, never diagonally), and as the fruit has a smooth surface, I try to blend it all in with a second damp brush as I go along.

There is always a stage where you look at it and think it looks dreadful, but persevere!


Save little details like the stalk or tiny blemishes until the end. Often it’s the little details that can bring it to life.
Have fun!

Six dancing dates  ©Shevaun Doherty 2014

"If you chase perfection, you often catch excellence" 
William Fowble