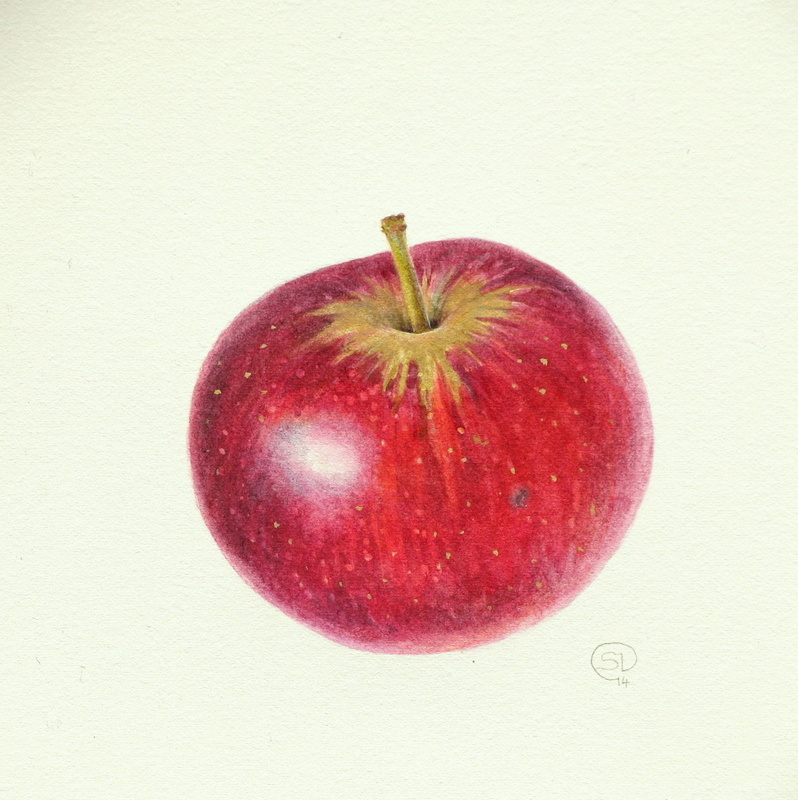
Friday, 31 October 2014

One Year On

Today is my blog's first birthday!!

To my great delight I awoke today to find that the blog has also reached that wonderful figure of 40,000 views! 

I'm thrilled to have made it through this first year and not yet run out of words or enthusiasm. There have been times when I haven't been sure what the blog will be about, but miraculously, the words always seems to fall into place

It's been such a rewarding experience in so many ways- writing things down has helped me focus on my art, and knowing that I have to write a blogpost really keeps me motivated. 
However the very best thing about blogging has been meeting people for the first time and finding out that they have been reading my blog, and that they find it interesting.

So this is just a short blog post to say a big THANK YOU to everyone who has visited this blog. I really love reading the comments and the messages of support. It's both uplifting and deeply humbling.

Here's to another happy year of art and blogging!

Mallard feather and yellow snail

“When we give cheerfully and accept gratefully, everyone is blessed.” 


Wednesday, 29 October 2014

SBA Palmengarten Exhibition, Frankfurt

Palmengarten, Frankfurt
Sometimes the title of an exhibition sets your mind alight with all sorts of creative possibilities.

That was certainly the case when I heard about the SBA’s exhibition in Frankfurt ,'Poisonous and Medicinal Plants. I love that theme. Botanical art is not just about painting pretty plant portraits, it’s also about raising awareness about plants and their attributes. This exhibition promised to be both visually exciting and informative.
My choice of subject matter was easy- I’ve always wanted to paint the plants from the spice markets in Egypt. I really enjoyed visiting the markets, haggling for my wares and then doing research on my subject matter. I blogged about it here.

The Spice Market © Shevaun Doherty 2014
Whilst I was painting this, I received an email asking me to send my painting of Phoenix dactylifera too, as they would like to use the image on one of the posters. As a new member of this prestigious Society, that’s a real honour. I decided to travel out to Frankfurt to see the exhibition myself.

A happy me with my painting and the poster which had information about how to become a member of the SBA
I arrived a day early, so that I could lend a hand with the preparations. ‘Team Palmengarten” had already done a splendid job. Gaynor Dickeson and her husband Robin had spent the summer organising all the paperwork and forms, collecting the paintings, and then driving with a van load of art work to Germany. 

That’s 200 paintings from 70 artists, travelling through 1200 miles through five countries!! 

Sunday, 19 October 2014

Stargazer Lily in Gouache


 I have a confession to make. Although I love flowers, I don’t really like painting flowers. I know that sounds odd coming from a botanical artist, but I find them really quite difficult. Perhaps it’s because I don’t paint quickly, or because I prefer dry brush to wet washes, but flowers have a transient beauty that can fade before the paint is even on the page. I know I’m not the only artist to howl with frustration when that perfect bloom wilts before your eyes and drops it’s petals. It’s far easier to paint fruit and vegetables, which last much longer and have their own distinct beauty and textures. Flowers can be scary!

However, this Natural Law exhibition is fast approaching, and Liz’s words are ringing in my ears
 “Paint the things that people like to give to each other, like flowers”

So I threw caution to the wind, bought some lovely stargazer lilies for myself and decided to paint a flower in gouache on dark green mountboard. Yes, I was feeling brave!


I selected a nice bloom, one that had just opened. I positioned it using a floral oasis and placed a dark green board behind the flower. If I was painting on white, I’d use a white board. It just helps isolate the bloom from the background.


I drew out my design on tracing paper. I find it useful to draw rough shapes like the circle as a guideline.


I traced the design on the reverse using a white Polychromos pencil, and then transferred that onto the green mountcard by going over the design with a pencil. So far, so good… the flower is still fresh and I’m still feeling quite confident.


Using white gouache, I began to paint over the white pencil lines, and slowly building up the form of the flower. This is the bit where you start to question your sanity as it can take a long time to get the right tones. The gouache tends to dry darker, so you have to keep building up the layers... and then more layers!  Inevitably, I ended up taking quite a bit of paint back off again too, but fortunately the mountcard is quite forgiving.

I know from previous experience with lilies, that it’s easier to paint the stamens and stigma first, and then to paint the petals around them, rather than to try to paint the petals first.


Once I had painted the stamens and stigma, and built up the form of the petals, it was time to introduce some colour. I switched here from gouache to watercolour. At first I mixed some of the watercolour with the gouache to make an opaque paint, but once the gouache is dry, it’s possible to continue building up the colour in transparent layers. 


As well as my red colour chart, I did a quick chart of the various pinks laid over white gouache on green card. The colours that I used for the petals were Permanent Rose, Quinacridone magenta, Purple magenta (Schmincke), Alizarin, Winsor orange, Rose madder. The shadow colours were Cerulean, Cobalt violet and Indanthrene.


As my friend Claire Ward says, “With gouache, it’s a case of forward and back, forward and back.” 
I love Claire's beautiful flower studies in gouache. She has quite a few gouache tutorials on her blog, Drawn to paint Nature which are worth looking at.


Once I was happy with the petals, it was time to put on those little spots, and also those tiny protuberances on the petals which act as important signposts for pollinating insects. Everything on a flower is so beautifully designed... even those spots follow subtle lines which lead to the center.
Finally I added the leaves and the stem, which were surprisingly quite easy to do, although perhaps painting green on green helps. I used Cerulean, Indanthrene, Lemon yellow and Perylene green.

Lilium Oriental Stargazer
Amazingly my little bloom lasted all week, and filled my studio with it’s divine smell. I still wouldn’t rush to into painting flowers, but it’s hard to resist their seductive charms.

 "When you take a flower in your hand and really look at it, it's your world for the moment. I want to give that world to someone else. Most people in the city rush around so, they have no time to look at a flower. I want them to see it whether they want to or not."
Georgia O’Keefe


Monday, 13 October 2014

Carpe Diem

“Know thyself. Know the customer. Innovate.”
 Beth Comstock

'Eve's Temptation' Shevaun Doherty 2014

Something totally unexpected happened the other week.

 An opportunity arose to put on an exhibition with some friends in the Law Library (The Irish Bar Council), where Irish barristers and judges have their offices. The area is brightly lit and spacious, and barristers are good potential clients. Previous exhibitions have supposedly done very well there. 
I always remember Katherine Tyrrell's advise  (of Making a Mark blog) "to hold an exhibition where the people who can afford to buy your paintings live" (or work), so fingers crossed, this could be worthwhile. However it’s only five weeks away and I have nothing prepared. Five weeks is really very, very soon. 

 
Three little quail's eggs
We went for a coffee to mull things over and decided that it is simply too good an opportunity to let pass. Between us we have enough art to make this an interesting and varied exhibition, and so the planning for the Natural Law botanical art exhibition began.

There are five of us involved- Yanny Petters, Lynn Stringer, Holly Somerville , Elizabeth Prendergast and me.

Burren Meadow, Verre églomisé panel by Yanny Petters

Crocosmia by Elizabeth Prendergast

Rhododendron delavayi by Lynn Stringer

Poppy, Papaver rhoeas by Holly Somerville

 Although I personally haven’t had a lot of experience in organising exhibitions, all of these artists are well versed in everything that needs to be done. They have all been very involved in both the Bloom Botanical Art exhibition, and  Aibitir, the ISBA’s Irish Alphabet in botanical art.

Lilies and Eryngium by Shevaun Doherty

So, what to paint? 

Calamondin orange, Shevaun Doherty

Well, there really isn’t a whole lot of time and being as it will be at the end of November, I’m going to work on some small paintings. Liz sells a lot of work, and she suggested doing lots of small affordable paintings, ones that could used as Christmas gifts. From her experience, paintings that have an emotional attachment tend to sell first, eg. a single flower (especially pink ones), dandelion clocks, apples, blackberries, even conkers. The weird and wonderful that we botanical artists like to draw usually doesn’t. Leaves, despite the pretty autumnal colours, also don’t tend to sell. Liz often grumbles that people seem to think that the leaves just grow on the page and that all the hard work involved in painting them is often overlooked. Of course, we will also have some larger paintings to bring a little variety.

King of Conkers

So now it’s a matter of getting my head down and getting some painting done. The next five weeks will fly by. I'll post more details about the exhibition once all the details are finalised.

This tiny vellum piece of Iris foetidissima seedhead will be perfect for the exhibition

 “Nothing great was ever achieved without enthusiasm.” 
Ralph Waldo Emerson


Friday, 3 October 2014

Alexander & Conkers


“Just to paint is great fun. The colours are lovely to look at and delicious to squeeze out. Matching them, however crudely, with what you see is fascinating and absolutely absorbing.”
Winston Churchill

I was completely taken by surprise when a beautifully wrapped parcel arrived last week from the States. 
Amongst the trove of treasures that lay within, was a curious little box with the words Alexander carefully written on the lid. Any other person might have first looked at the accompanying card, but caught up in the excitement of these unexpected gifts, I ripped open the little box …  and shrieked like a banshee when an enormous and very dead beetle fell out! 
A kind hearted friend, knowing my fondness for beetles, had found him and decided to post him to me. She called him Alexander after this lovely poem by A.A. Milne. 

Alexander is a ten lined June beetle, or watermelon beetle, a native of the USA. When I read up about these beetles, I discovered that the males have enormous antennae which they use to sniff out the females. Sadly, by the time that Alexander had made his transAtlantic crossing, he was missing both his antennae and the bulk of his legs, but with a bit of creative licence, I managed to restore him to his former glory and painted him at twice his actual size. His portrait will be winging it's way back to my thoughtful friend this week  (thank you DM). As another friend remarked “He’s the dandy of the Beetle World”.


I found a little beetle, so that Beetle was his name,
And I called him Alexander and he answered just the same.
I put him in a match-box, and I kept him all the day ...
And Nanny let my beetle out -
Yes, Nanny let my beetle out -
She went and let my beetle out -
And Beetle ran away. 
 

 Conkers


Feeling very pleased with myself, I decided to paint a few conkers. For those who don't know, conkers are the common name for the fruit of the Horse Chestnut tree, Aesculus hippocastanum . 

Colour chart of earth pigments- there are quite a few that I don't use, but it's handy to see them all side by side like this.
I have a little colour chart of all the earth colours that I have which I always keep nearby. Although I do like to mix my own browns, it’s really useful to have a small chart like this and I constantly refer to it. It’s also quite startling to see the difference between the different brands of the same pigment, most notably Winsor & Newton’s raw umber and Daniel Smith’s raw umber. I use them both a lot!

Conker progression
The shiny new conkers are a joy to paint. Once I had figured out what colours to use and in what order, they are not too different from painting dates. They take careful observation, lots of layers and dry brushwork. 

As always I started with a base washes of cerulean and cobalt violet, taking care to reserve the highlights. Then I began with the lighter colours, getting progressively darker as more and more layers went on. I blended each layer as I went, and took care to keep the edges paler than the center. 

Cerulean, Cobalt violet, Cobalt (Daniel Smiths),Natural sienna, Winsor orange, Light red, Quinacridone gold deep (Daniel Smiths), Burnt sienna, Burnt Umber, Perylene maroon, Perylene Violet, Purple Lake, Raw Umber and Indigo. I also used Brown madder and Piemontite  (Daniel Smiths) on some of the darker conkers


Another little conker starts off. I've placed the conker on a separate sheet to protect the page, secured with a wad of Blu-Tack to stop it rolling off! You can see the initial washes here.
A few layers of paint later and you have a lovely polished conker

The cases were fun to paint too. I used a wash of Lemon yellow with a touch of sap green (the smallest amount), and then dropped in cerulean and a tiny bit of perylene green where needed. The spikes are the same earthy pigments of the conkers. I definitely needed a magnifying glass to paint those!

The finished page! This will used for my next Nature Sketchbook Exchange entry. 
Using all those transparent pigments has made me yearn for the silky softness of vellum, so conkers on vellum is next on my painting list! Mind you, the rosehips look very tempting too! With so much to choose from, I'm definitely going to be busy!


"Play keeps us vital and alive. It gives us an enthusiasm for life that is irreplaceable. 
Without it, life just doesn't taste good."
 Lucia Capacchione

Saturday, 27 September 2014

The Artichoke

Cynara scolymus © Shevaun Doherty 2012
Once upon a time, on a tiny island in the Aegean sea, lived a beautiful girl by the name of Cynara. So fair and lovely was she, that the Greek god Zeus, emerging from the sea after a visit to his brother Poseidon, fell for her charms the moment he laid eyes on her. He persuaded her to return with him to Mount Olympus, to live as a goddess and keep him entertained whilst his wife, Hera, was busy. However Cynara grew homesick for her family, and disobeying Zeus, returned once more to the mortal world. Enraged at her betrayal, Zeus cast her back to earth, transforming her into the artichoke, Cynara cardunculus. 

There is a lot of debate as to the true origins of the artichoke, although I quite like the fanciful tale above. It certainly grows in abundance throughout North Africa and the Mediterranean, and was much favoured as a delicacy by the early Greeks and Romans. The cultivated form of the plant lacks the spiny bracts of it’s wild cousin, the cardoon, and is called Cynara scolymus. 

Sketchbook studies of Cynara scolymus
It was first described by Theophratus, (371-287 BC) considered the “father of botany”, in his treatise 'Enquiry into Plants'. Later the artichoke became one of the illustrated medicinal plants that featured in Dioscorides’ Greek Herbal in the first century AD. 

Unfinished sketch of a dying flowerhead
As well as being a tasty dish, the Greeks and Romans considered the artichoke a digestive aid and an aphrodisiac. In fact, such was it’s reputation as a powerful aphrodisiac, that by the 16th century, women were actually forbidden from eating it! It was Catherine de Medici, wife of King Henry II who broke with that tradition, when she introduced it to France from Italy. She is said to have once eaten so many at a banquet, that the guests watched in horror, convinced that she was going to burst.

I can totally understand Catherine de Medici’s great fondness for the artichoke, as it is one of my favourite vegetable dishes too. My Egyptian mother-in-law always makes “al-kharshuf mashi” for me whenever I visit, a delicious dish of baked artichoke hearts stuffed with minced lamb. You can find that recipe here.

Placing a white board behind the plant is a great way to isolate it from it's surroundings for painting
 It’s also a great plant to paint, having a wonderful sculptural shape, with elegant arching silver leaves and round flower head, topped by mass of purple florets, known as the “choke”. I’ve painted it a few times now and it's not as difficult as you would think.

Follow the lines of the spiral. The bracts fit into those little shapes. A simple line drawing on tracing paper is a handy guideline to refer back to when painting
I begin by drawing out my plant in pencil first. This is one of the plants where the Fibonacci Spiral is quite evident, so getting the drawing right is very important.  I’ve found that it’s best to draw the basic shape of the flower head first (round in this case), and then to carefully observe the direction of the spirals within that shape, keeping in mind that they curve around the shape and aren’t just straight lines. Count the bracts on each line to make sure that you have the right amount. It’s a good idea to trace out this initial drawing and to keep this as a reference to one side, because once the paint goes on, it’s quite easy to lose your way.


I paint over the pencil lines in watercolour, using mixes of naples, raw sienna and quinacridone violet. I then erase my pencil lines. Once that is done, I started to slowly build up the colour, bract by bract. The green is a mix of lemon, cobalt and indigo. In places I switched to winsor yellow.


I also used raw umber, manganese brown, caput mortuum, perylene green and winsor violet here.
**This was painted last year and if I was doing it again, I’d probably replace the manganese brown and the caput mortuum with more transparent colours such as burnt sienna mixed with winsor orange or winsor orange-red, and perylene violet.**

I've added masking fluid to the little florets at the front of the artichoke and a few suggestions of the tips of ones behind
To tackle the choke, I've picked out a few of the front florets with masking fluid. I apply it with a thin brush (a cheap one, not a sable!!)  Sometimes I put it on with a toothpick. It's important to let it dry before you apply any paint, but also don't leave it on the paper for more than 48 hours as it can be hard to get off. 


The choke was done using Cobalt violet and helio blue. I painted this mix loosely over the masking fluid, dropping more paint into the wet wash and allowing it to blend and mix on the page. Once that was completely  dry, I carefully rubbed off the masking fluid, and began to paint the little florets using pale mixes of the blues and purples. I used purple lake (quin violet would also work), Egyptian violet (Lefranc & Bourgeois), permanent blue violet (Rembrandt), winsor violet and perylene maroon. 


You have to slowly build up the shapes within... at first painting the florets, and then once you have achieved the right colour and tone for them, switch to painting the shadows and negative shapes between. I did have to lift a few florets out as I went too dark... it's just trial and error. Try to keep the florets that had been masked off  quite pale.

It will look a real mess at first, but persevere. It takes time and patience.  All of a sudden it takes shape and becomes believable.

Getting the dark shadowy bits at the top of the bracts and just below the choke made a real difference, and pulled the painting together I used winsor violet mixed with perylene green to make a nice dark colour.

Artichoke flower head, Cynara scolymus © Shevaun Doherty 2013

I've yet to paint an artichoke flower this year, but only because I haven't come across one yet. Any offers would be gratefully received! My botanical artist friend Jarnie has been growing one in her garden and has been taking gorgeous photographs of it on her blog, so I'll be watching with interest to see just how she goes about painting it. 

"The artichoke with a tender heart
Dressed up like a warrior, standing to attention,
It built a small helmet under its scales,
It remained 
Unshakeable"
Pablo Neruda, Ode To The Artichoke

Note: although the story of Zeus and Cynara is widely found on the internet, I can’t find a verification of it being a genuine tale from the Classics, but I like it anyway

Monday, 22 September 2014

Daily Moments


 “Painting from nature is not copying the object; it is realising one's sensations.”  
Paul Cezanne

This week has been a busy one, but inspired by the artists who are taking part in the 30 Day Challenge, I have managed to put aside an hour or two each day to sit down and paint. There is something quite liberating in doing these small daily challenges. The focus is not on producing a finished piece of work, but just on the simple pleasure of creating.

The week began with a study of geranium flowers. I had been asked to paint a single flower as part of a commission, but it was such an enjoyable subject that I couldn’t resist filling the page with petals and buds. Every time I see geraniums I think of warm sunshine and the long lazy days of summer… bliss!

The trick to painting reds is to use lots of layers. I used initial washes of winsor orange, winsor orange-red and permanent rose. Then I applied glazes of scarlet lake, vermillon, winsor red and finally Schmincke Dark Red, which I think is the best dark red that you can find. For the darkest shadows, I mixed the dark red with a tiny bit of winsor purple.

Next up was the strange little fruit of the  Handkerchief tree, Davidia involucrata. This tree is best known for the large leafy bracts which hang like white handkerchiefs over small flowers in spring. I was curious about the fruit, which had a slightly pungent aroma, so included a dissection.

Davidia involucrata

Gingko biloba leaf. 
A  Gingko leaf was next on my easel. My little leaf was past it’s best but that made it all the more enjoyable to paint. I have never painted one before, but it’s a very popular choice for botanical artists, perhaps because of Rory McEwen’s superb depiction of a gingko leaf. For those who have never heard of Rory McEwen, he was one of the most influential botanical artists of the twentieth century. Here's a short video about his work-


The following day I painted the tiny blue fruit of the Woodland-Passionflower, Passiflora moriflora.  I was short of time, so did just a simple line drawing of the vine and the leaf. It’s such a pretty plant with an abundance of flowers and wonderful tendrils, definitely one for my ‘Must Paint List’.


 I was quite curious about the little blue fruit that I had painted, so the next day, I cut it open. I was surprised to find bright orange seeds and deep purple flesh. What a striking and unexpected combination. It tasted horrible though!


My final subject was a tiny acorn that I found whilst out on my walk. I collected quite a few which I hope to paint before putting them in the garden for the hungry resident squirrel.


The weekend came but there was no time for painting because I went on a photography workshop in  June Blake’s Garden in Co. Wicklow. What a stunning place! This excellent workshop was run by Bernard Van Giessen of www.catchlight.ie.


Although I almost always paint from life, I also take reference photographs of my subjects as a back up. I also prefer to photograph my work as I find the scanner too harsh. However my little camera has been set on automatic since the day I got it, and I really wanted to learn how to use it properly.


 What a wonderful day it was! The garden is magnificent and Bernard was patient, informative and incredibly encouraging. To top it off, the company was great and there was a really delicious lunch too.


By the end of the day, I had learnt how to take a semi-decent photograph, met some lovely people and finally understood what an f-stop is! It’s definitely manual all the way for me from now on!


Life may be hectic, but it’s really worth putting aside a little time each day to live in the moment. Paint, draw. or simply go outside and take a photograph.

“Be happy in the moment, that’s enough. Each moment is all we need, not more.” 
Mother Theresa